

 1360
1360 To create a WordPress website from scratch, register a domain, choose hosting, enable an SSL certificate, install WordPress.org, configure the structure, and test the site before publishing. For a content project or a service website, you don't need to know how to code: most of the work is done in the hosting panel and the WordPress admin panel.
This guide will walk you through the entire process: from choosing a domain for your website and connecting DNS to creating pages, menus, backups, and adding your site to Google Search Console. At each step, you'll learn what results you want users to achieve and how to ensure everything is working properly.
We'll be discussing WordPress.org, installed on your own hosting: this option gives you access to files, a database, themes, and plugins. It's important to distinguish it from WordPress.com, a separate service with its own pricing and limitations. Menu item names may vary depending on your hosting, theme, and WordPress version, but the general launch sequence remains the same.
How to Create a WordPress Website from Scratch: What to Prepare
To create a WordPress website yourself, first define its purpose, create a preliminary list of pages, and ensure that the domain, hosting, and administrative access will be registered to you or your company. This preparation will help you avoid changing the project structure after the system is installed.
WordPress.org vs. WordPress.com: Which option is described in the instructions?
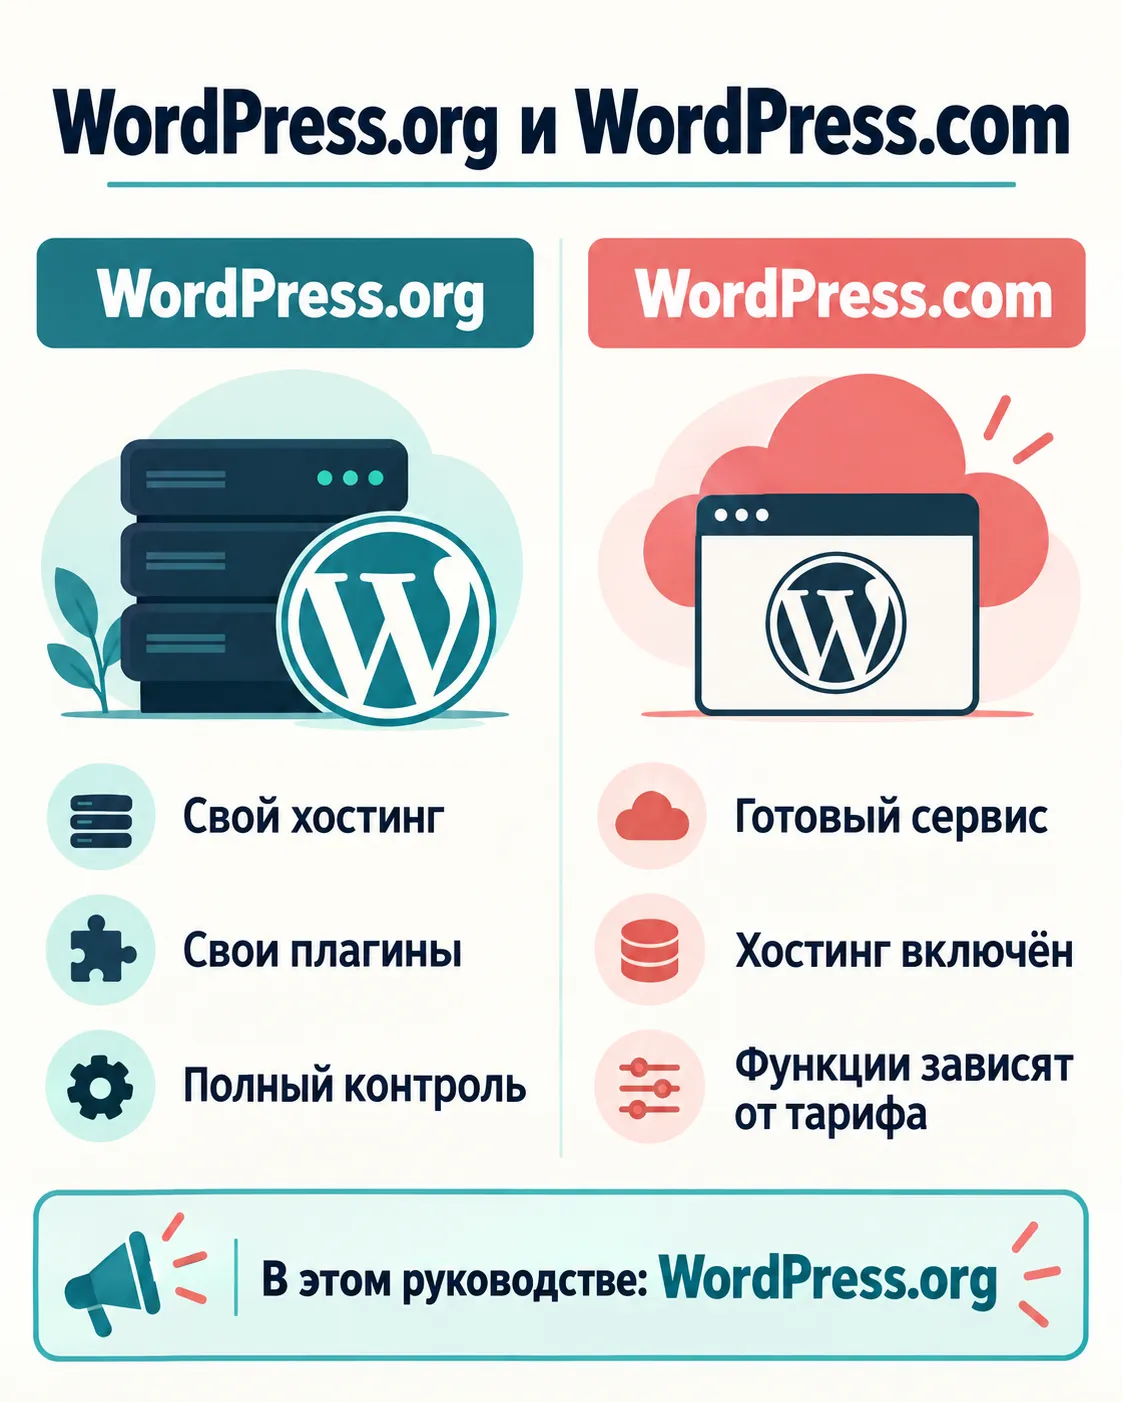
If you're just getting the hang of it, What is WordPress?, It's important not to confuse the two options. WordPress.org is a project website that offers a free, open-source content management system. It's installed on your chosen hosting and connected to your own domain. You control the files, database, themes, and plugins, but you're also responsible for updates, security, and backups.
WordPress.com is a standalone service with website hosting and its own pricing plans. The available features and level of control depend on the chosen plan. Migration and installation of additional tools may also be subject to limitations.
This guide explains how to create a WordPress website from scratch on your own hosting using WordPress.org. This approach is suitable for a small business service website, an information project, or a personal blog and gives you more control over your data and technical settings.
Site purpose, pages and access
Before registering a domain, briefly formulate the project's purpose. For example, a service website should explain the offer and help visitors contact the company. A personal blog should publish content under several clear headings.
Prepare before you start:
- purpose of the site and one main action of the visitor: leave a request, call, read an article or subscribe;
- draft list of pages: for example, home, services, about the company, contacts and privacy policy;
- content structure: list of services or future blog headings;
- project name and several domain name options;
- logo, texts and images, if they are already ready; you can start with a text title;
- separate work email address to register a domain, hosting and receive technical notifications;
- owner's details, to whom the services will be issued;
- a safe place to store access credentials, for example a password manager.
Don't share passwords through public documents or correspondence. If a contractor is working on the site, create a separate account for them, if possible, rather than giving the owner primary access.
You can test your preparation with a simple question: can you explain in two sentences who the website is for, what purpose it serves, and what sections are needed at launch? If so, you can move on to choosing a domain.
Step 1: Select and register a domain
Domain for the website — This is the address visitors enter in their browser. Choose a short and descriptive name, register it in your name or your company's name, and retain access to your registrar account. You don't necessarily need to purchase a domain from your future hosting provider: separate management often simplifies website transfers.
How to check a domain name and zone
Come up with several name ideas. For a service website, the company name, brand name, or a combination of the service and a distinctive word is usually suitable. For a personal blog, you can use the author's name or a name that doesn't limit future sections.
- The name is easy to pronounce, hear and type without explanation.
- It does not contain unnecessary hyphens, numbers or ambiguous transliteration.
- It does not copy a well-known brand and does not infringe trademark rights.
- The same or similar name is available in the required domain zone.
- The name is suitable for email addresses of the form info@domain.
Check availability through a domain search with an accredited registrar. For Ukrainian audiences, consider national and regional extensions, as well as international options. Some extensions have special registration requirements, so review the rules of your chosen domain in advance. For example, the requirements for some addresses may differ from those for .com.ua or international extensions.
Additionally, search for the name in search engines and social media. If a company in the same industry already uses it, it's better to choose a more distinctive option. The result of this step is a successful domain: it's available, recognizable to your audience, and doesn't create an obvious conflict with someone else's brand.
Who should register the domain and how to maintain access?
Register the domain to the actual owner of the project: yourself as an individual or a company. Don't register it to a developer, employee, or acquaintance. Use a work email address that you control in your account information.
- Create a separate account with the registrar.
- Use a unique, complex password and enable two-factor authentication if available.
- Save your registrar name, login, renewal date, and backup codes in a secure password manager.
- Turn on renewal notifications and make sure your contact email is up to date.
- Make sure that the panel allows you to change DNS servers and obtain a domain transfer code, if provided by the zone rules.
After payment, open your registrar account and ensure the domain is displayed in your account, and the contact information and registration period are correct. There's no need to change DNS or enable HTTPS yet—those are the next steps. Please review these separately., How to choose hosting for WordPress, and then point the registered domain to the selected server.
Step 2: Choose WordPress Hosting
For a standalone website, choose a hosting service that supports current WordPress requirements, allows you to manage files and the database, enable an SSL certificate, and create backups. It's important that the site can be migrated to another provider without data loss.
What to check with your provider before paying
Hosting is the server space where WordPress, images, and your website's database will be stored. Don't rely solely on the plan name or promises of "optimization": compare the technical capabilities.
- Compatibility with WordPress. Check your plan's parameters against the current official WordPress.org requirements. Your provider must support suitable versions of PHP, MySQL, or MariaDB, and the HTTPS protocol.
- Access to data. Check if a file manager or SFTP is available, as well as database management and export. This is necessary for website diagnostics, copying, and migration.
- PHP Management. It would be desirable to be able to change the supported PHP version and basic limits through the hosting panel or support service.
- Domain binding. Check if you can connect a domain registered with another company and change the DNS records yourself. If you haven't yet decided on a website address, first figure out, how to choose a domain, but do not transfer control over it to a contractor unless necessary.
- Scaling. Make sure that the tariff can be changed as traffic, file size, or the number of websites increases.
- Support. Find out if your provider helps with WordPress server errors, HTTPS, DNS, and backup restores.
Before paying, please ask support a specific question: "Does the selected plan meet current WordPress.org requirements, and will I have access to the files and database?" The expected result is a clear confirmation listing the available tools, not just a sales pitch.
Backups, SSL, and Support
Automatic backups should cover both files and the database. Specify the backup frequency, retention period, location, and restore procedure. It's helpful to have a downloadable backup: this reduces dependency on a single provider. Having backups doesn't negate your own backup before updates and major changes.
An SSL certificate is required for your website to operate over HTTPS and protect data during transmission. Check whether your plan includes certificate issuance, whether automatic renewal is supported, and whether you can force redirect visitors from HTTP to HTTPS. The mere presence of the SSL button doesn't guarantee correct configuration—you'll check it after connecting the domain.
The result of this step: you've selected a plan with a compatible server environment, file and database access, backups, SSL, and a clear support channel. Save your provider's login information in a password manager and don't send your password in plain text to anyone.
Step 3: Connect your domain and enable HTTPS
In this step, you'll point your domain to your hosting and enable a secure connection. Expected result: when you enter your domain, your website or hosting service page opens, and the browser uses the address with the prefix https://.
Where to change DNS records or name servers
DNS links a domain to the server where the website is hosted. You can find connection parameters in your hosting panel or contact support. Your provider typically offers one of two options:
- Change name servers, or NS. Enter your hosting NS addresses in your domain registrar's account. After that, DNS records are typically managed through the hosting panel.
- Modify individual DNS records. If you want to leave DNS management with your registrar, point the A record of your primary domain to the server's IP address. For a subdomain www Use the record recommended by your hosting provider - often an A record or CNAME.
Don't use both methods simultaneously unless necessary. If email is already configured for the domain, don't remove MX, TXT, or other unfamiliar records, as this may disrupt email delivery and third-party service verification.
Save your changes and add the domain in your hosting panel if it doesn't happen automatically. DNS updates aren't always instantaneous. To check, open the domain in your browser and use the DNS checker. The result should be correct: the domain points to your hosting IP address. If the old website appears, check the values you entered and try again later.
How to check if a certificate is working
An SSL certificate allows you to open your website via HTTPS and secures data transfer between your browser and the server. In your hosting panel, find the SSL, HTTPS, or Security section, and issue a certificate for your primary domain and version. www, if used. Many hosting providers support automatic certificate issuance and renewal.
- Open the website at https://ваш-домен.
- Make sure your browser doesn't show an insecure connection warning.
- Check the certificate details: the domain name must match and the expiration date must be current.
- Enter the address via http://. It should redirect you to the HTTPS version.
If a warning appears, check that the certificate is issued and that the domain is pointing to the correct server. After installing WordPress, also ensure that internal resources are loaded over HTTPS; mixed content occurs when a secure page accesses images or scripts over HTTP.
Working HTTPS is needed not only to protect visitors: it is the basic technical preparation of the site, on which analytics and SEO for WordPress.
Step 4: Install WordPress
Automatic installation via the hosting panel
Most hosting providers offer a WordPress installer in their control panel. The section names may vary, such as "Install Applications," "CMS," "Application Catalog," or WordPress Manager. Before you begin, make sure your domain is connected to your hosting and accessible via HTTPS.
- Open the installer and select WordPress.
- Specify the desired domain and HTTPS protocol.
- Select the installation directory. For a site with a primary URL, the directory field is usually left blank. A value like
blogwill install the system at the addressexample.com/blog/. - Set a site name, administrator email address, and a unique username. Don't use an obvious login.
admin. - Create a strong, unique password and save it in a password manager. Don't share or show your login information to anyone.
- Run the installation and wait for the panel to notify you of completion.
Expected result: The main page opens at the domain address, and the login form is available at your-domain/wp-admin/. Check both addresses in a private browser window. There shouldn't be any warning about an insecure connection.
What to do if there is no automatic installation
Manually installing WordPress on your hosting requires access to the files and database. First, check that your server meets the current WordPress.org requirements. Specific recommended versions of the software environment change over time, so check the official requirements page.
- Download the latest archive only from WordPress.org and unzip it on your computer.
- Create a database and a separate user with access rights to it in the hosting panel. Save the database name, user, password, and database server address.
- Upload the contents of the unzipped WordPress folder to your domain's root directory using a file manager or SFTP. Don't delete existing files until you know their purpose.
- Open the domain in your browser. The installation wizard will prompt you for database settings and generate a configuration file if necessary.
- Specify the site name, administrative email, unique login and strong password, then complete the installation.
If the wizard reports a database connection error, check all four parameters: database name, username, password, and database server. If you see a blank page or a server error, check the error log in your hosting panel and contact support to confirm that your current server environment is compatible with WordPress.
First login to the control panel
Go to the address your-domain/wp-admin/ and log in with the credentials you created. After successful authorization, you'll see the WordPress Dashboard with a sidebar menu. Open your site via the site name in the top bar and ensure the public portion loads without errors.
At this stage, it's enough to check three signs of a successful installation: the console is accessible, the homepage opens, and HTTPS is used. Themes, permalinks, pages, and plugins are configured in the following steps—don't install random extensions from unknown sources.
Step 5: Configure your site after installation
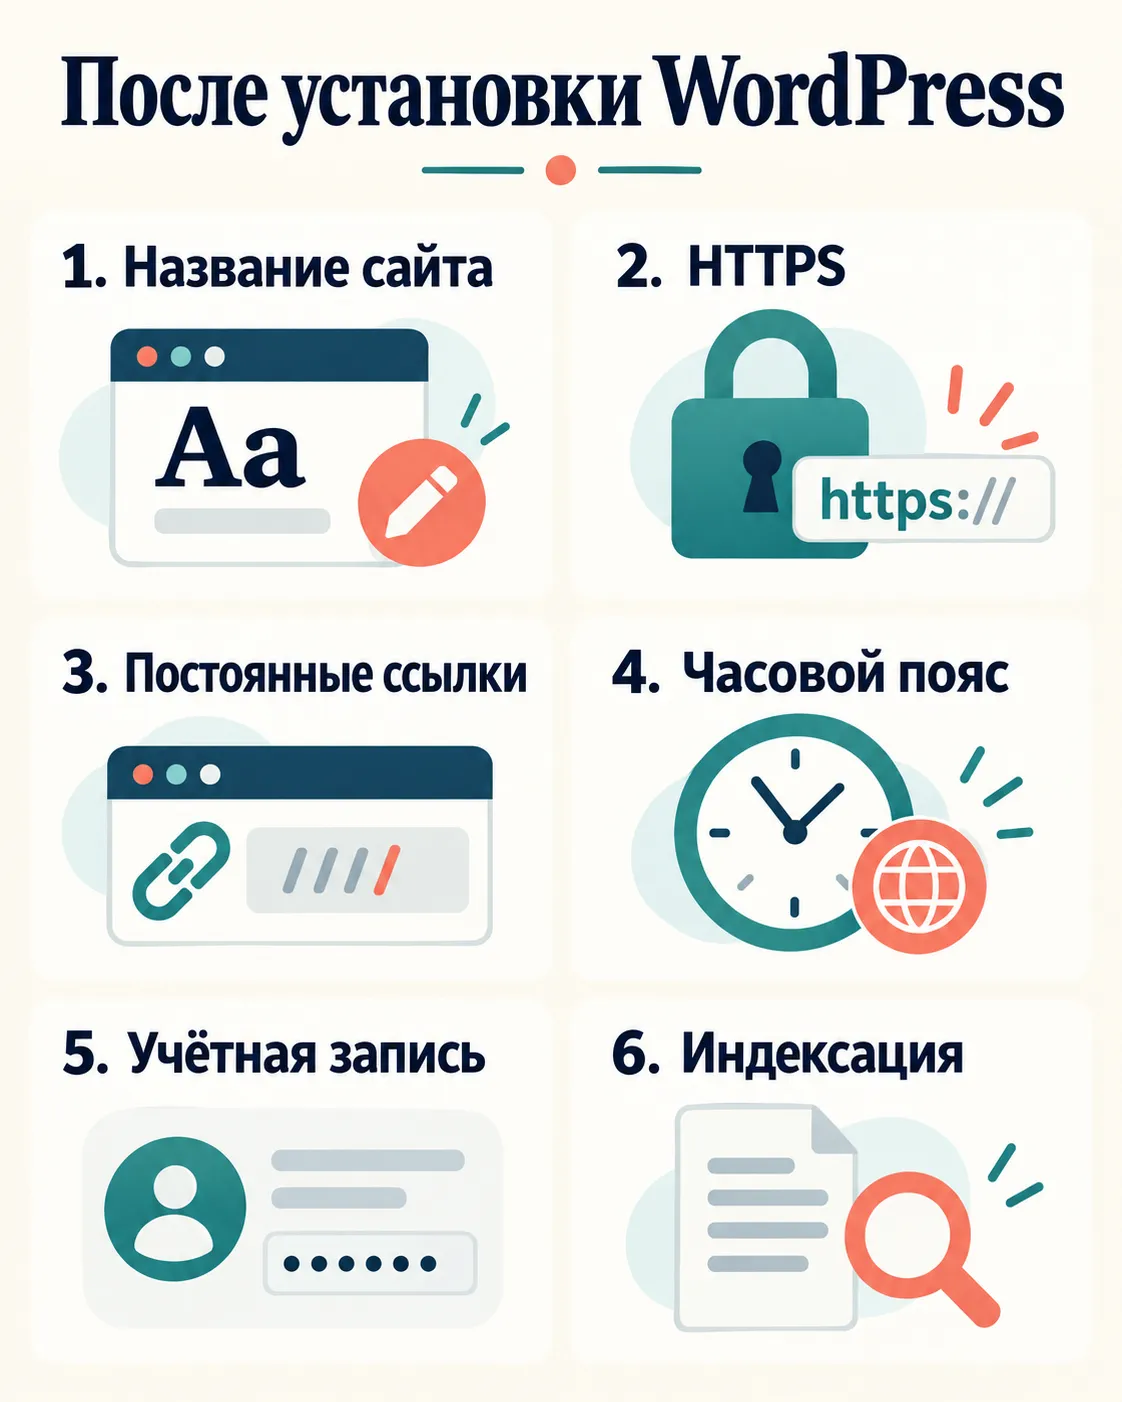
After logging into your WordPress dashboard, complete basic site setup. You'll now be working with the control panel settings. The names of the options may vary slightly depending on your WordPress version and interface language.
Name, language, time zone and admin profile
Open Settings → General. Provide a descriptive website name and a brief description. For a service website, you can use the company name and specialization, and for a blog, the author's name and the topic of the posts.
Select the interface language and time zone appropriate for your project location. Save the settings and check that the date and time are displayed correctly in the console.
Then go to Users → Profile. Specify a display name that visitors will see. Do not use your administrator login publicly. Check your email address: it may receive system notifications and access recovery messages. Do not share or publish your password.
Permalinks and Search Visibility
In the section Settings → Permalinks Choose a clear URL structure. The "Post Title" option uses a page slug instead of a numeric ID; check if it's appropriate for your site. After saving, open the post and make sure it loads without a 404 error. For more details, see official WordPress documentation.
Next, open Settings → Reading. Find the option that tells search engines not to index the site. If the site is ready for publication, the checkbox should be unchecked. If the materials are still being finalized, this option can be used temporarily, but be sure to check again before launching. This is only a recommendation to search engines, not a reliable protection for a closed project.
Removing demo content
Delete the default post, demo page, and test comment if they were created by the installer. Check the sections Recordings, Pages And Comments, move unnecessary items to the trash, and then empty it.
Expected result of this step: the site data is correct in the console, the time is displayed correctly, the profile does not reveal the administrative login, page addresses are readable, and visitors will not see demo materials.
Step 6: Choose a theme and design the pages
How to choose a theme without being tied to a single template
A WordPress theme determines the website's appearance: typography, colors, block layout, and page templates. Choose a theme not based on a demo photo, but on its structure, performance, and the ability to customize the design without coding.
Before installation, check:
- correct display on smartphones and tablets;
- Compatibility with your version of WordPress and block editor;
- availability of regular updates and clear documentation;
- the ability to change fonts, colors, content width and page layouts;
- no mandatory dependency on a separate constructor;
- ease of transferring content when changing the theme in the future.
You can install the design option through "Appearance" → "Themes" → "Add New." The names of the options may vary depending on your WordPress version and theme type. For a block-based theme, the design is typically accessible through "Appearance" → "Editor," while for a classic theme, it's accessed through "Customize.".
Activate the theme and open several typical pages. Make sure the headings are legible, the text fits within the screen, and the buttons are visible. Don't choose a theme just for the sake of a large set of pre-made layouts: unnecessary elements complicate maintenance. Before making a final choice, test the loading speed and usability on a phone.
Home page and mobile version
For a service website, the homepage should quickly explain what you offer, who it's for, and how to contact you. Include a clear headline, a list of services or benefits, examples of your work or proof of expertise, and a clear, actionable page.
For a personal blog, it's more logical to display recent publications, main categories, and a short bio of the author. Don't try to cram all of the site's content onto the homepage: each section should lead the reader to the next clear action.
Create a layout in the block editor using standard blocks: headings, paragraphs, images, columns, and buttons. After each significant change, check the page on your phone, not just in preview mode. Pay attention to the following details:
- the text is readable without magnification;
- the columns are rearranged in the correct order;
- the buttons are easy to press with your finger;
- images do not cut off important parts;
- there is no horizontal scrolling;
- There is enough free space between the blocks.
The result of this step is a unified basic design and a homepage that remains accessible on both computers and smartphones. If, after changing the theme, the main text and images remain intact, and the only adjustments that need to be made are primarily to the design, the structure has been chosen successfully.
Step 7: Create Main Pages and Menus
What pages are needed at the start?
Start with a minimal set of pages that explain who you are, what you offer, and how to contact you. In your WordPress dashboard, go to "Pages" → "Add New," create each page, and publish it after reviewing it.
- Home. Briefly explain the purpose of the site and include a clear next step.
- «"About the company" or "About the author". Tell them what you do, who you help, and why they can trust you. Use verifiable information.
- Services. Describe each direction, the result for the client and the method of contact.
- Blog. For publications, use posts and several clear headings.
- Contacts. Please provide current contact methods and business hours.
- Privacy Policy. If the site collects data, prepare a document that reflects the actual operation of the site and applicable requirements.
Expected result: Visitors should be able to understand the site's purpose and find ways to contact it without further explanation. Check each page in preview mode: the title should be clear, the text should be complete, and the buttons and contact information should be functional.
How to create clear navigation
Add only the key sections to the main menu. In a classic theme, the relevant screen is usually located under "Appearance" → "Menus." In a block-based theme, go to "Appearance" → "Editor" and select the navigation block. The names and locations of the items may vary depending on the theme and WordPress version.
- Place the main page first, then services or categories, information about you and contacts.
- Use short titles: «Services» is clearer than advertising wording.
- Avoid creating multiple levels of nesting. Combine related pages into a single drop-down menu.
- Save the menu and assign it to the main area of the theme.
- Open the website on your computer and phone, click on each item and check if the page you open matches its name.
Navigation is complete when any major section is accessible within a few clear steps, the menu doesn't obscure content on a mobile screen, and there are no empty, duplicate, or draft page items.
Step 8: Add only the features you need
Plugins extend WordPress's capabilities, but you shouldn't install them "for the future." Every additional module requires updates, can slow down your site, or conflict with your theme. First, identify the essential features, and then choose a suitable tool.
Contact form, backup and protection
For your service website, add a form with a minimal set of fields: name, contact method, and message. If the form collects personal data, check what notifications and consents are required for your specific case. Don't ask for unnecessary information. Send a test application and ensure the message is received by the recipient and isn't marked as spam.
The backup should include the website files and database. First, find out whether your hosting provider creates backups, how long they are stored, and whether you can restore the website yourself. If your hosting provider's backup capabilities are insufficient, set up a separate plugin and store the backups off-site. A successful backup message isn't the only test: make sure the archive is available for download or restoration. Create a fresh backup before updating WordPress, your theme, or important plugins.
For basic protection, use unique passwords, separate accounts with the necessary privileges, and timely updates. A security plugin can help monitor suspicious activity, but it doesn't replace secure hosting and backups. Check your settings against official WordPress security recommendations.
How to check plugins before installation
- Source. Download extensions from the official WordPress directory or from a reputable developer's website.
- Compatibility. Compare the plugin requirements with your WordPress version and server environment.
- Support. Check the last update date, change history, and the developer's responses to user feedback.
- Purpose. Avoid installing multiple plugins with the same functionality: they may conflict and create unnecessary overhead.
- Terms of use. Find out what features are available for free, what data the module processes, and whether the content it creates can be downloaded.
Before activating, make a backup. Then check your key pages, forms, menus, and admin panel. If errors appear or the site changes unexpectedly, deactivate the new plugin and restore the backup if necessary. It's best to not simply deactivate unused extensions, but to delete them after verifying they are no longer needed.
Step 9: Prepare your website for search and analytics
Before publishing, check that search engines can understand the site's content and structure. This requires clear titles and URLs, interconnected pages, a sitemap, and Google Search Console. These steps don't guarantee high rankings, but they help identify technical issues and provide search engines with the correct data.
Headlines, URLs, images, and internal links
For each page, create a unique main title that accurately describes its content. Avoid using the same titles, such as "Home" or "Service," across multiple pages. Arrange subheadings sequentially: the main page title, then sections and nested subsections.
- Page address: Make it short and clear. If you're changing an already published URL, set up a redirect from the old address.
- Images: Upload files of appropriate size and fill in alt text when the image conveys useful information.
- Internal links: Link related pages with clear anchors.
- Structure: Important pages should be accessible through menus or links from other content.
Open the website in visitor mode and follow the links. Expected results: URLs are legible, images are displayed, and there are no blank pages or error links.
Sitemap and Google Search Console
An XML sitemap is a service file containing a list of searchable URLs. WordPress and SEO tools can generate one automatically, so first find out which mechanism is already in use and avoid creating multiple competing sitemaps.
- Open the sitemap address in your browser and make sure the file loads without error.
- Add the property to Google Search Console and verify your domain or website ownership using the suggested method.
- Specify the XML map address in the corresponding section of the service.
- Check individual important URLs using the Page Checker tool. Indexing reports don't appear immediately.
Before submitting, make sure the option preventing search engines from indexing your site is not enabled in your WordPress settings. Don't enable it without testing, as this may prevent your pages from appearing in search results on a published project.
For analytics, connect your chosen traffic tracking system and verify data is being received in its interface. Avoid deploying code twice—for example, through a theme and a separate tool simultaneously—otherwise, metrics may be duplicated. After connecting, also check the cookie notice and personal data processing, taking into account the services used and applicable requirements.
Step 10: Test your website before launching
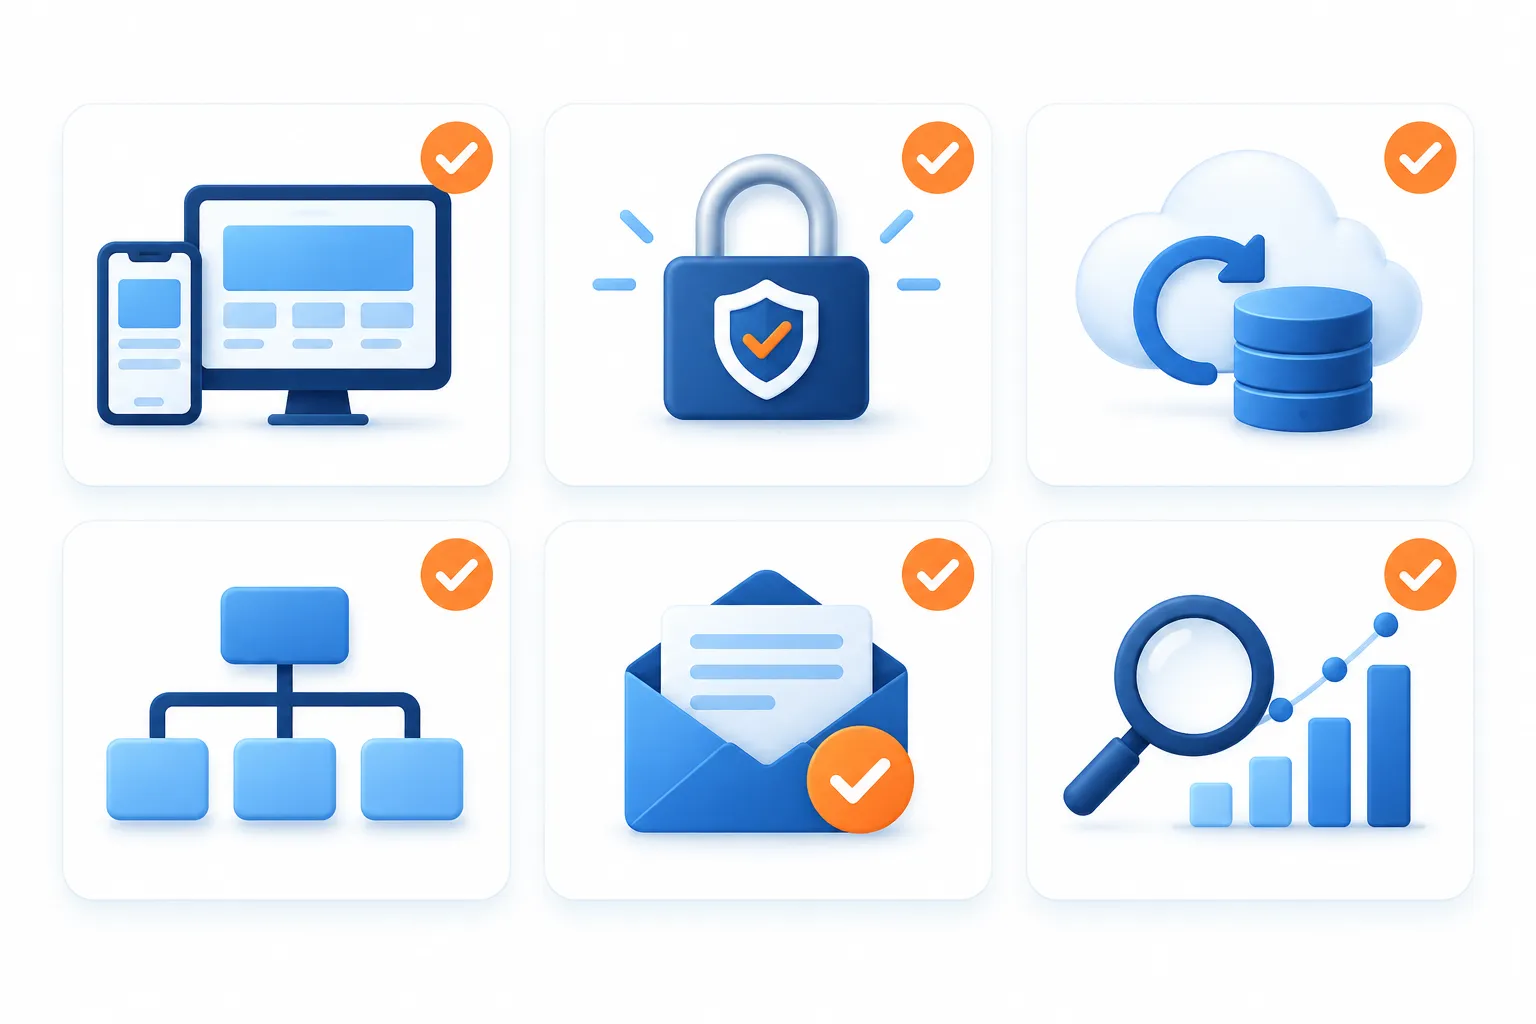
Before publishing, visit your site as a regular visitor: open key pages on different devices, submit forms, check links, and make sure a backup is available. Afterward, remove the indexing ban if you enabled it during development.
Check on phone and computer
Open the home page, menu, services or appointments page, contact information, and the feedback form. Check the site not only in WordPress preview mode but also in a regular browser. It's recommended to use at least one computer and one smartphone.
- The text can be read without magnification, and the lines do not extend beyond the screen boundaries.
- The menu opens and does not overlap the content.
- The buttons are easy to press with your finger.
- Images are not cropped or stretched horizontally across the page.
- Headings, lists, and spacing look consistent.
- The contact number and email address are provided correctly.
- No test entries, template phrases or blank pages.
Additionally, open the website in private browser mode. This will allow you to see it without the admin panel and identify pages accessible only to authorized users.
Forms, links, HTTPS, and backup
Submit each form with test data. The expected result is that the visitor sees a confirmation, and the message is sent to the specified recipient. Do not publish real passwords or other sensitive data in articles, applications, or screenshots.
- Click all buttons and menu items, including the logo and footer links.
- Check that internal links point to existing pages and do not return a 404 error.
- Open the address with
http://: it should redirect to the versionhttps://. - Make sure your browser doesn't show any warnings about insecure connections or mixed content.
- Create a backup copy of your website files and database.
- Check that the archive has actually been created, is available for download, and is stored on more than just the same server.
It's best to perform a full test restore on a separate copy of the site or with the help of hosting support to avoid accidentally overwriting production data.
Opening for indexing and post-publication actions
If you restricted search engines from indexing your site during development, before launching, go to "Settings" → "Reading" and check the search engine visibility setting. The name of the setting may vary depending on your WordPress version and localization. Only remove this restriction after verifying that your site contains no drafts or confidential materials.
Please note: this setting provides a recommendation to search robots, but by itself does not provide reliable protection for sensitive information. For a non-public website, access must be restricted through the hosting service or another suitable method.
After publishing, reopen the pages without logging in, add the resource to Google Search Console, and submit a valid XML sitemap. Its URL depends on your WordPress and SEO plugin settings: first, open the sitemap in your browser and make sure it's accessible.
Final launch checklist:
- the site works correctly on a phone and a computer;
- forms are submitted, links and menus are opened;
- all pages are loaded via HTTPS;
- a verified backup copy has been created;
- test materials removed;
- Indexing is allowed only after content verification;
- The site has been added to Google Search Console and the sitemap has been submitted for processing.
Common mistakes when starting up on your own
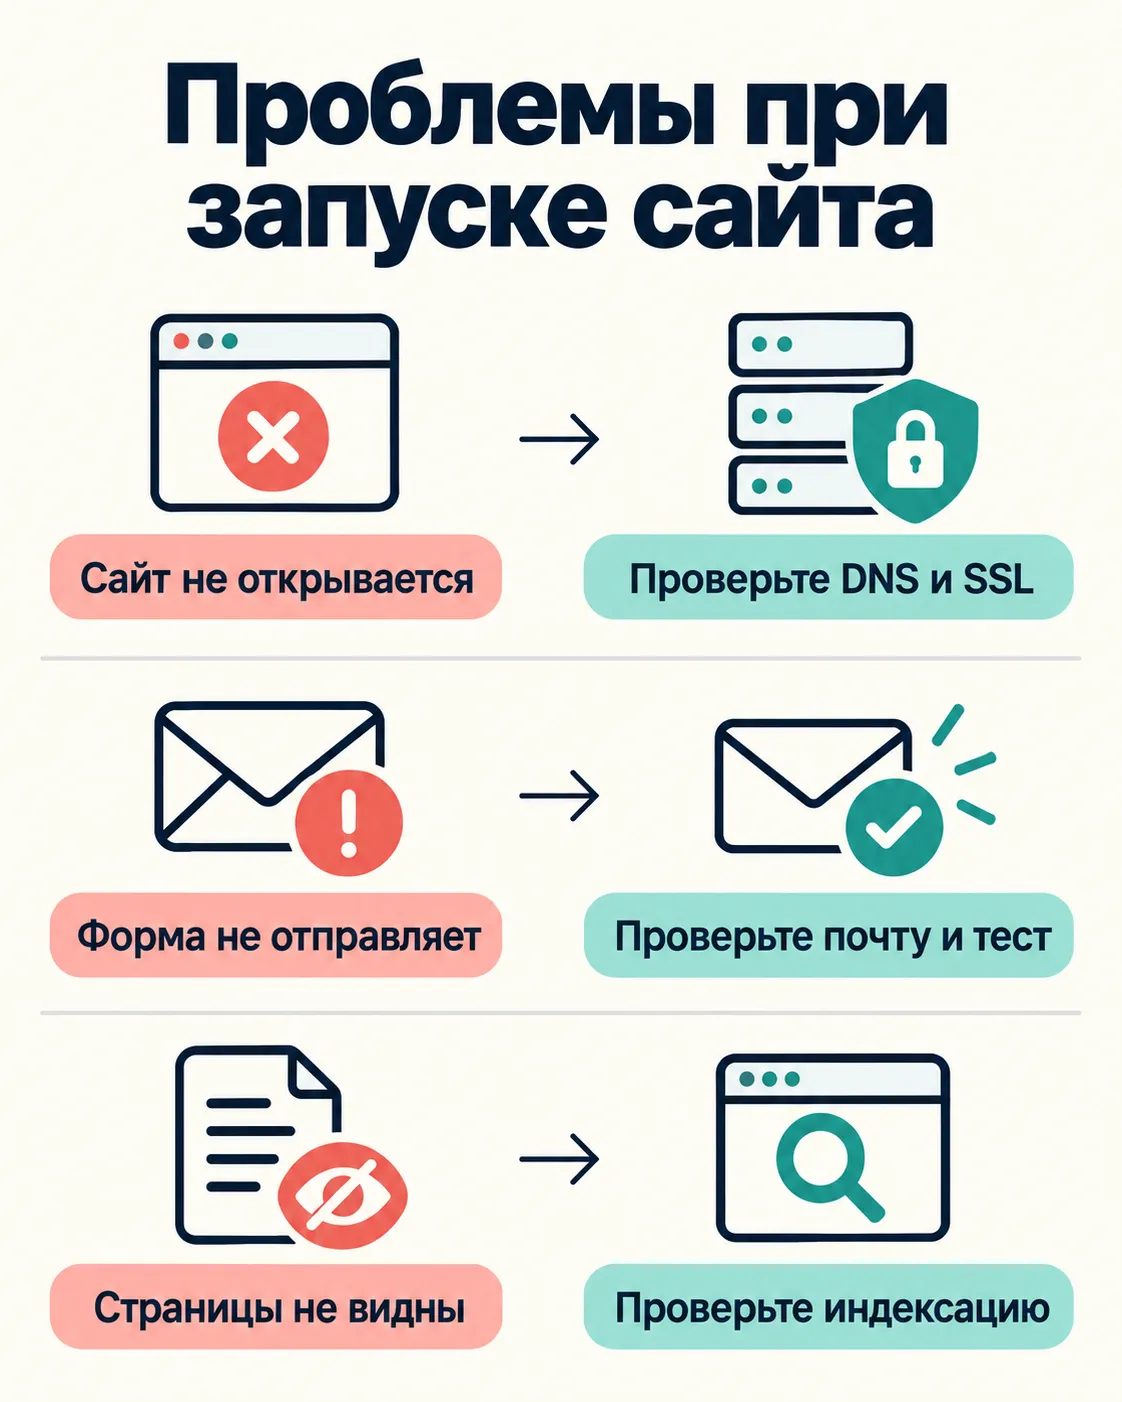
Most launch issues aren't related to WordPress, but to missed checks: the site only opens at one address, important pages are unavailable, forms don't submit messages, or search engines see a technical version. The following list will help you identify and fix these errors.
- The domain is not registered to the website owner. Check access to your registrar account and DNS management.
- Temporary hosting address remains. Check the URLs of pages, images, and menus; create a backup before replacing old URLs.
- Mixed HTTP and HTTPS. Check the certificate, primary address, and resources that are still being loaded via HTTP.
- The site is closed from indexing. Check "Settings → Reading," robots.txt, and Search Console reports. Enable access only for the publicly accessible website.
- Forms do not deliver letters. Send test messages and check your email, including your Spam folder.
- Too many plugins. Find unused and duplicate extensions; make a copy and check the site before deleting them.
- Copies are stored only on the same hosting. Clarify the recovery procedure and keep an additional copy separately.
- Mobile version not tested. Open key pages on your phone and check buttons, forms, and wide elements.
After each fix, clear the website and browser cache, then test again in a private window. Change one parameter at a time: this will make it easier to determine the cause of the problem and restore it to working order if necessary.
When self-tuning is no longer enough
Launching a service website or personal blog on WordPress is entirely possible. A specialist's help becomes justified when the task goes beyond the scope of a standard theme, ready-made blocks, and standard plugins, or when an error could lead to the loss of data, requests, or access to the site.
Consider hiring a developer, system administrator, SEO specialist, or other specialized professional if you need:
- a custom calculator, personal account, booking, or integration with CRM, payments, and external API;
- modification of a theme or plugin by changing the code, database or server;
- transfer of an existing website with a large number of pages and a complex URL structure;
- regular errors, site unavailability or plugin conflicts;
- recovery from hacking and verification of the cause of compromise;
- speeding up a project when basic optimization doesn't help;
- setting up complex access rights and data processing processes;
- Regression testing of important functions after WordPress, theme, and plugin updates.
Before handing over a task, formulate the expected result and how to verify it. For example, instead of "make the website faster," specify the problematic pages, devices, and observed delays. For integration, describe what data should be transferred, in what direction, and what the user will see upon success or error.
Maintain control over your digital assets. It's best to register the website domain, WordPress hosting, licenses, and external services in the name of the business owner, and grant the contractor separate access with the minimum necessary rights. Don't share passwords in the technical specifications or in open correspondence. Revoke temporary access rights and save the documentation after the work is completed.
Before making any changes, create a backup copy of your files and database and check for recovery. It's safer to perform significant modifications on a test copy rather than on the live site. After completing the work, request a list of modified files and settings, extensions used, update conditions, and steps to take in case of failure.
You can outsource complex technical work to a specialist while retaining control over the domain, hosting, backups, and access. If ready-made solutions are insufficient, assess the scope of work and acceptance criteria beforehand. ordering website development on WordPress.
Frequently asked questions
Is it possible to create a WordPress website yourself without programming?
Yes. To create a WordPress website yourself, you usually only need to know how to use the hosting panel, the WordPress admin panel, and the block editor. Code may be required for custom designs, integrations, or complex logic, but an informational website, a blog, or a basic service site can be launched without it.
How is WordPress.org different from WordPress.com?
WordPress.org provides a free website management system that you install on your chosen hosting and connect to your own domain. You control the files, database, themes, and plugins.
WordPress.com is a standalone service with website hosting and its own pricing and limitations. This guide is for WordPress.org hosted on your own account. Before registering, check the specific hosting option your provider offers.
Should I buy a domain and hosting from the same company?
No. You can register a domain with one provider and order hosting from another. To connect, you'll need to specify the DNS records or name servers provided by the hosting provider. It's important that you maintain access to your registrar and hosting accounts.
Is it possible to build a website first and connect the domain later?
Yes, if your hosting provider provides a temporary address or technical domain. However, before publishing, check your site's main address, HTTPS, internal links, and redirects. Also, make sure the temporary URL isn't left in your text or settings.
How many plugins can I install?
There's no universally safe number. The quality, compatibility, and purpose of each plugin are more important. Keep only essential extensions, remove unused ones, and ensure active plugins are updated. Several conflicting or resource-intensive solutions can create more problems than a large number of simple extensions.
Is it possible to change the theme after launch?
Yes, but the new theme may display menus, widgets, templates, and blocks differently. Before replacing, make a backup and test the design on a test copy of your site. Post and page content is usually preserved, but theme-specific elements may require reconfiguration.
When will the site appear on Google?
Publishing your site doesn't guarantee immediate search results. Your site must be accessible without a password, not blocked from indexing, and open correctly over HTTPS. Adding your site to Google Search Console helps inform the search engine about your site and check for technical issues, but it doesn't guarantee specific timelines or rankings.
Is it possible to transfer a finished website to another hosting?
Yes, if you have access to the website files and database or a full backup. Before migrating, check the compatibility of your server environment, save a separate copy of your data, and do not disable your old hosting until you have tested the pages, forms, HTTPS, and admin panel on the new server.


 Russian
  English
  Ukrainian
  German